I still remember the day I decided our tiny closet wasn’t cutting it anymore — we needed a proper walk-in pantry that was organized, pretty, and didn’t cost an arm and a stroller. If you’re a stay-at-home mom who wants a functional pantry without hiring a designer, this post walks you through our DIY walk-in pantry reveal on a budget: the plan, the exact steps we followed, and the real costs so you can copy it (and tweak it for your space).
DIY Walk-In Pantry Makeover (Budget-Friendly)
Description
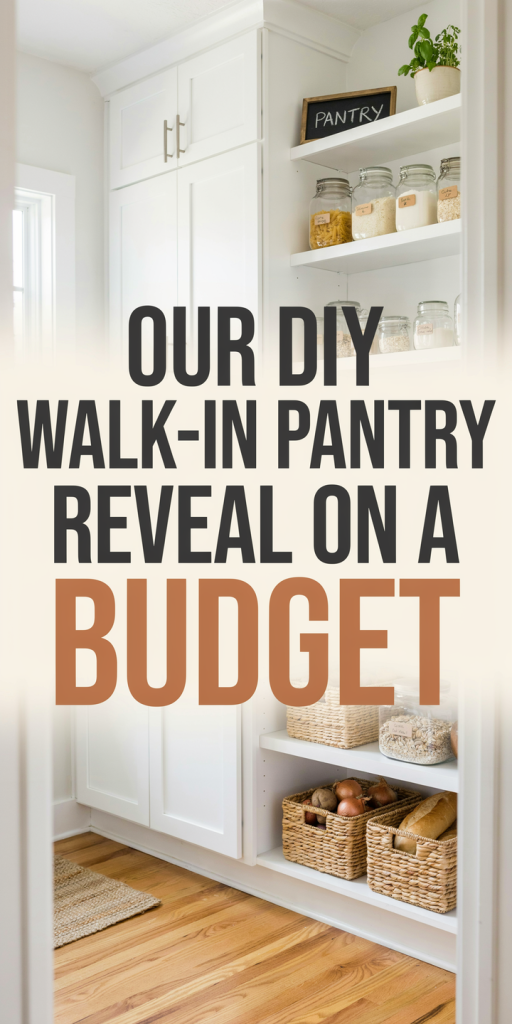
– We transformed a 4′ x 6′ closet off our kitchen into a bright, functional walk-in pantry using budget shelving, paint, simple lighting, labeled storage, and clever door solutions. The goal was to maximize vertical storage, make everything visible at a glance, and keep kid-safe zones for snacks and breakables.
Practical setup steps
1. Measure and plan
– Measure width, depth, and height. Sketch shelves at 6″, 10″, and 16″ spacing for spices, canned goods, and small appliances.
2. Declutter and purge
– Empty the closet, toss expired foods, and group like items so you know what storage sizes you need.
3. Prep the space
– Patch holes, sand rough spots, and apply a bright, washable paint. Light colors make small spaces feel larger.
4. Install shelving
– For budget shelves, choose a combination of wall-mounted brackets with MDF or plywood shelves (cut to size) or affordable pre-made wire shelving. Anchor into studs for heavier loads.
5. Add lighting
– Install a battery-powered motion-sensor LED light if you don’t want to run wiring. They’re bright and easy to install.
6. Create zones
– Dedicate low shelves to kids’ snacks, middle shelves for everyday pantry staples, and higher shelves for bulk items and appliances.
7. Use uniform containers and labels
– Transfer loose items to clear stackable bins and canisters to reduce visual clutter and keep things fresh.
8. Door solutions
– Use an over-the-door rack or slim rolling shelves for baking sheets and foil, or add a child-proof latch if needed.
9. Finishing touches
– Add a small lazy Susan for oils and vinegars, a spice rack at eye level, and a chalkboard or whiteboard on the inside door to track grocery needs.
Estimated startup costs
– Paint + supplies: $25–$60
– Shelving materials (DIY MDF or pre-made wire): $60–$200
– Motion-sensor LED lights: $15–$40
– Clear storage bins and canisters: $30–$80
– Hardware and anchors: $10–$30
– Optional door rack or organizer: $15–$50
Total estimated cost: $155–$460 (our final spend was around $220 — we reused some bins and scored a sale on shelving).
Tips from our experience
– Shop sales and measure twice. Many big-box stores have cut-to-size wood or shelf boards you can buy under budget.
– Prioritize visibility over perfection — clear bins help you see what you have at a glance and reduce food waste.
– If you want to stretch your budget, look for gently used shelving or canisters on local buy/sell groups.
Quick resources and ideas to make the project easier (and maybe earn a little extra while you DIY)
If you want to offset supplies with a little income or build something long-term while the pantry comes together, here are practical, mom-friendly options I explored and recommend:
- Grow a side hustle with flexible hours — even an hour a day can cover boxes and labels.
- Consider starting your blog to share before/after photos and organizing tips; this can eventually lead to passive income.
- Use Pinterest to save ideas and drive traffic if you blog about home projects or family life.
- If you want a simple site to showcase your project or blog, pick reliable website hosting and a lightweight theme for fast setup.
- For truly flexible, low-barrier income, try doing a survey gigs in nap times — they won’t replace full-time income but help with small expenses.
- Schedule your project announcements or sale posts with a social media scheduling tool so you can share results without being glued to your phone.
- If you want to sell organizing kits or digital printables later, learning about sales funnels helps you convert visitors into customers.
- Need help with odd jobs like cutting shelves or graphic design for labels? Hire someone on Upwork or get quick gigs on Fiverr.
Small, consistent steps made our pantry project manageable: measure, purge, and shop smarter (sales + pre-owned items). If you decide to document the process, those posts or pins can turn into a mini-income stream while you enjoy a calmer, more functional kitchen space.
Thanks for reading — I hope this gives you the confidence to plan your pantry reveal and the practical roadmap to do it affordably. If you try any of these ideas, I’d love to hear what worked for you and any hacks you discovered along the way.