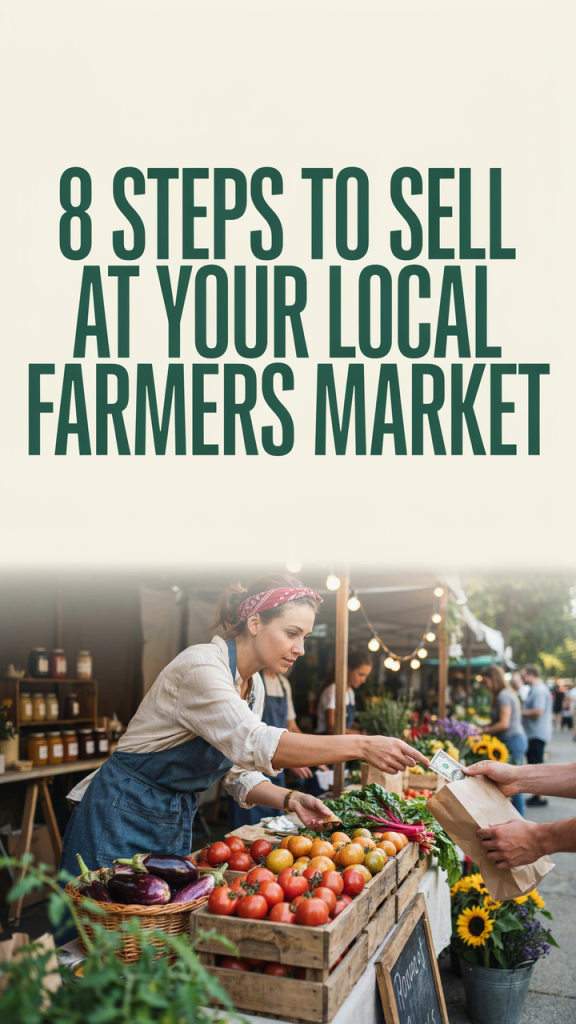
Selling at a local farmers’ market is one of the clearest, lowest-friction ways to take a product from kitchen or workshop to paying customers. You get face-to-face feedback, instant revenue, and a marketing lab where you can test pricing, packaging, and messaging. This guide gives a practical, step-by-step roadmap — from deciding if your product belongs in a market to the exact permits, an application checklist, startup budgets, day-of operations, and merchandising tactics to turn a stall into a steady source of local income.
Key Takeaways
Why local markets are a smart first step (and what to expect)
– Benefits: immediate customer testing, cashflow the first day, regular foot traffic, brand-building in your neighborhood, low-cost marketing (word of mouth), and a chance to refine operations before scaling to wholesale or retail.
– Realistic expectations: early sales are uneven — launch weekends can be great, others slow. Markets reward consistency: a vendor who shows up reliably builds repeat customers and trust. Markets also have overhead (fees, time, permits), and food or seasonal products have spoilage risk.
– Steps ahead at a glance: choose product + test demand → research markets → handle legal compliance → apply and prepare booth → plan inventory and pricing → operate and iterate.
One-season launch timeline (simple): choose a market 12–16 weeks before your target first day. That gives time for market acceptance, permits, insurance, and creating labels/packaging. If you’re already on a waitlist, start paperwork immediately — permits sometimes take weeks to process.
Ready to turn an idea into practical income?
Decide whether your product fits
Markets accept a wide mix: fresh produce, cut flowers, live plants, baked goods, canned and bottled value-added foods (jams, pickles), prepared food for immediate consumption (food trucks, hot plates), craft and artisan goods (jewelry, textiles), and specialty packaged items (soaps, candles). But acceptance varies by market and by state.
Common restrictions and red flags
– Raw meat or shellfish often require commercial kitchen and advanced permits.
– Certain value-added goods (meat-based prepared dishes, dairy-made items) usually need a commercial kitchen and health department approval.
– Markets sometimes limit duplicate product types (only a few bread vendors allowed) to protect vendor diversity.
– Markets set rules on sampling, electricity, and tent sizes.
How to test demand before applying
– Pop-up at a friend’s event, co-op, or a smaller community fair to gauge interest.
– Run a small pre-sale: offer a limited run of product to local social followers and collect deposits.
– Set up a one-off market day (farm, church fair) to measure price sensitivity and most popular SKUs.
– Use quick tactile tests: give 20–30 samples to neighbors or workplace colleagues and ask structured feedback (taste, price, label clarity, packaging).
Quick product fit checklist (use before you apply)
– Can my product be safely sold under local/state food rules? (If food, check cottage food list for your state.)
– Does the product fit within the market’s vendor mix?
– Can I produce enough inventory consistently?
– Can I price it to cover costs plus a profit and pay stall fees?
– Do I have a compelling story/brand to attract foot-traffic attention?
Market research: how to choose the right market
Not all markets are equal for every product. Evaluate these elements:
Size and foot traffic
– Weekly headcount matters for visibility. Larger markets increase potential customers but also competition.
– Consider weekday vs weekend markets: commuter markets (morning) attract different buyers than weekend family markets.
Customer profile
– High-income neighborhoods may pay premium prices for artisanal goods.
– Markets near universities may value affordable snack or grab-and-go items.
– Look at what buyers are carrying and buying: baskets and reusable bags often indicate committed local shoppers.
Seasonality and weather
– Indoor winter markets offer year-round options but may have higher stall fees.
– Outdoor markets depend on weather; factor in poor-weather contingency (tent sides, weights).
Vendor mix
– Saturation: if there are five soap vendors, your handcrafted soap may struggle unless you offer a strong point of difference.
– Complementary vendors can drive cross-sales (baker next to coffee seller).
Fees and acceptance process
– Understand space fees (per market day vs seasonal), electricity costs, and whether markets take a commission on sales.
– Ask about jurying: do they require photos and product samples? Are there waitlists?
Tools and sources
– Visit markets in person across different days and hours.
– Talk to current vendors — ask candidly about daily sales ranges and customer return rates.
– Read the market’s vendor handbook and Facebook group posts to see issues and community sentiment.
Questions to ask market managers
– What is weekly attendance and demographic profile?
– How many vendors sell products like mine?
– What are stall sizes, arrival and teardown times, and load-in logistics?
– What paperwork, insurance, or permits are required to apply and to sell?
– What are cancellation or bad-weather policies?
– Is there a vendor orientation or marketing support?
Legal and compliance basics in the U.S.
Your legal requirements depend on product type and state/county rules. These are the common components.
Business structure and registration
– Sole proprietor: simplest, but your personal assets are not separated. You may operate under your name or file a DBA (“doing business as”).
– LLC: separates personal assets; many small sellers use single-member LLCs for moderate cost and protection. Formation costs vary by state.
– Employer identification number (EIN): needed for hiring or sometimes preferred for business bank accounts; a social security number can suffice for sole proprietors.
Sales tax collection
– If your state taxes retail sales of your product, you must register for a sales tax permit and collect and remit tax. Rules differ for prepared food vs groceries.
– Get set up with a sales tax permit early — some markets require a copy for your application.
– Keep records: daily sales logs and tax collected simplify filings.
Food-safety rules and cottage food laws
– Cottage food laws allow certain low-risk foods made in home kitchens to be sold directly to consumers. The allowed list and sales channels vary by state.
– High-risk foods (meat, unpasteurized dairy, some canned goods) typically require commercial kitchen production and health department inspections.
– If you sell prepared food at your stall (e.g., hot tacos), you may need a temporary food vendor permit or commissary kitchen.
– Food handler training / ServSafe: many markets require at least one person on site to have a food-safety certificate.
Labeling requirements
– Packaged food usually needs: product name, net weight, ingredient list, allergen statement (FDA “major food allergens” list), and business contact info. State labeling may add requirements (e.g., “made in home kitchen” for cottage food).
– Non-food items may need materials or safety labeling (e.g., toys, cosmetics require ingredient and warning labels or batch codes).
Health department permits
– Contact your county or city health department early. Permits can require inspections and take weeks to months.
– Temporary event permits exist for one-off events; some markets hold blanket permits for vendors, others require individual permits.
Step-by-step compliance checklist (start this 8–12 weeks before first market)
– Decide business structure and register name.
– Apply for EIN and open a business bank account.
– Register for state sales tax permit if required.
– Check cottage food laws or commercial kitchen requirements for your product.
– Sign up for food-safety/food-handler training if needed.
– Obtain required local health permits and schedule inspections if necessary.
– Get vendor-specific documentation requested by markets (insurance certificates, product list).
– Prepare compliant labels and ingredient/allergen lists for all packaged goods.
Application and acceptance process: what markets expect
Most markets want clear, professional submissions. Common components:
Application components
– Product list and detailed descriptions (ingredients for foods).
– High-quality photos: of the product (packaged and unpackaged), and a mockup of your stall or display.
– Proof of insurance (or commitment to obtain upon acceptance).
– Vendor history or references (especially if you’ve sold at other markets).
– Completed forms: vendor agreements, W-9 (sometimes), and local permits.
Jurying or vetting
– Many markets use a jury made up of managers and vendors who review the submission for quality and fit.
– Jury decisions consider creativity, product quality, and how the product complements the market.
– Be honest about production capacity; overpromising leads to stockouts and reputational risk.
Timelines and acceptance tips
– Apply early: several markets draw waitlists months before the main season.
– Tailor application materials to each market: managers can tell when you’ve copy-pasted a generic submission.
– Include a short story about your product — what makes it local, handcrafted, or unique.
– If jurying requires samples, follow instructions exactly (label sample, deliver on time and in sanitary packaging).
Budget and startup costs: realistic line items and sample ranges
Costs vary widely by region, market size, and product type. Below are typical line items and reasonable startup ranges for a first season (estimate assumes a U.S.-based vendor starting small):
Fixed and one-time startup costs
– Market stall fees (seasonal or per day): $30–$150 per market day; some premium markets are higher.
– Canopy/tent (10×10 recommended): $150–$600 for consumer-grade; $300–1,200 for pro-grade.
– Tables and chairs: $100–$400.
– Signage (banner, tabletop signs): $50–$300.
– Branded packaging (labels, printed bags): $50–$500 initial run.
– Portable cooler / small refrigerator or ice containers: $100–$600.
– Scales, food warmers, and display risers: $50–$400.
– Point-of-sale (POS) system and card reader: $20–$300.
– Business formation fees and DBA: $0–$150.
– Health permits, inspections, and food-safety training: $0–$300+ depending on county and training levels.
– Insurance (see next section): $300–$1,000+ annually.
Inventory and ongoing costs
– Ingredients and raw materials: depends on product.
– Packaging per unit: $0.20–$3+ depending on product type and quality.
– Transportation fuel and vehicle wear.
– Market stall fees recurring per market day.
Sample conservative first-season budget example (10 market days)
– Canopy & equipment: $600
– Signage & packaging initial: $300
– Initial ingredients & inventory: $600
– POS reader & printer: $150
– Insurance (annual): $450
– Permits & training: $150
– Stall fees (10 days at $75): $750
Total startup and season operating = $2,700
Breakeven calculation (simple)
– Fixed season costs (above) = $2,700.
– Average gross profit per unit = retail price – variable cost (ingredients + packaging + market-specific overhead per unit).
– Example: jam jar sells for $8. Variable cost = $2 (ingredients + jar + label). Contribution margin = $6 per jar.
– Breakeven units = fixed costs / contribution margin = 2,700 / 6 = 450 jars across 10 market days → 45 jars/day.
– Adjust assumptions based on your real numbers and realistic daily sell-through.
Insurance and liability
Markets commonly require vendors to carry insurance and name the market as an additional insured.
Types of policies
– General liability insurance: protects against third-party bodily injury and property damage claims at your stall. Markets commonly require $1M per occurrence.
– Product liability insurance: crucial for edible or body-care products — covers illness or injury claims linked to a product.
– Commercial property insurance: covers equipment and product if stolen or damaged.
– Umbrella policy: adds extra coverage over general liability if you need higher limits (useful for scaling).
– Vendor-specific policies: some insurers offer vendor packages for market sellers with tailored coverages.
How to compare quotes
– Ask for quotes from multiple small-business insurance brokers.
– Confirm market-required limits and additional insured wording.
– Check deductibles, exclusions, and whether product liability is included.
– Cost factors: annual revenue, product category (food often costs more), number of employees, and location.
When additional policies make sense
– If you sell perishable food or charge customers for preparatory services, product liability is essential.
– If you’ll carry high-value equipment or inventory in your vehicle, commercial property or inland marine insurance can help.
– If you plan to scale to wholesale or multiple markets, consider umbrella coverage.
Booth planning and equipment: essentials and layout
A professional, accessible booth draws customers and makes transactions efficient.
Essential equipment list
– Sturdy pop-up canopy (wind-rated if in exposed areas) with weights.
– Tables and tablecloths (tablecloths should be secured).
– Display risers, crates, baskets for vertical merchandising.
– Clear, legible signage with product names and prices.
– Small fry pan or warmer if selling hot food (check health rules).
– Coolers and ice packs for perishable items.
– POS device with battery pack; cash float and small change.
– Label printer or pre-printed labels for new ticks.
– Trash bin and sanitizing supplies (hand sanitizer, wipes).
– Weatherproof storage tubs for transport.
– Extension cords and power strips (if electricity is allowed) and GFCI protection.
Stall layout principles for customer flow
– Create a clear entry point and open face to approach (remove barriers like a front table blocking access).
– Place best sellers at eye level and near the front to grab attention.
– Use risers to create a sense of abundance and allow customers to see all SKUs.
– Design a single point of sale to prevent traffic jams; keep the card reader visible and fast.
– Ensure ADA-friendly spacing and an accessible approach for wheelchair users.
Packing and transport tips
– Pack the night before with a checklist; load heavy items first.
– Use labeled bins for product categories and a box for point-of-sale, cash, and receipts.
– Secure the canopy and gear so nothing shifts during transit.
– Bring extra packaging and bags for unexpected sales.
Packaging, labeling, and sampling best practices
Packaging is both functional and marketing — it must protect product, meet labeling rules, and tell your story.
Compliant labeling for food
– Include product name, net weight (by weight or volume), ingredient list in descending order, allergen declaration (e.g., “Contains: eggs, almonds”), and business name & address.
– Follow state-specific labeling rules for cottage food items (some require a statement that the product was made in a home kitchen).
– Use waterproof labels and package seals to maintain professionalism.
Non-food item labeling
– For cosmetics and soaps, include ingredient lists and any required warnings (e.g., for topical products).
– For crafted children’s items, note age appropriateness and any small-part warnings.
Sampling and hygienic practices
– Follow local market rules for sampling. Many markets require single-use utensils or portion cups, and an employee with food-safety certification on-site.
– Use tongs or toothpicks for bite-sized samples; avoid bare-hand contact with ready-to-eat samples.
– Keep samples covered until served and replenish in small batches to avoid exposure.
– Offer disposable napkins/plates and a nearby trash receptacle.
Packaging as brand communication on a budget
– Use a consistent label template and color scheme to build recognition.
– Add a short story or usage suggestion on the label: “Try on toast” or “Goes well with sharp cheddar.”
– Use stickers for small-run items and consider biodegradable bags for a premium impression.
Day-of operations and selling strategies
Getting the basics right on the market day creates smooth customer experiences and higher sales.
Pre-market checklist (arrive early)
– Confirm stall location and set up canopy with weights.
– Arrange displays with high-margin items at eye level.
– Place price tags or shelf-talkers on all items so customers don’t have to ask.
– Test POS device and mobile payment. Ensure Wi-Fi or cellular connectivity.
– Prepare a cash float with $1s, $5s, and quarters for change.
– Post a clear sign of accepted payments (cash, card, Apple/Google Pay).
Pricing strategies that work
– Cost-plus: total cost (ingredients + packaging + labor + proportionate share of fixed costs) × markup. Use this for first pricing tests.
– Keystone: double the wholesale cost to get a retail price; works for some crafts but may be too high for food.
– Perceived-value pricing: price based on what local customers will pay; test incrementally.
– Offer bundles and discounts smartly: “Buy 3, save $2” increases average sale value.
Customer service and upsell techniques
– Smile, greet, and offer a brief story about your product — people buy stories as much as products.
– Use sampling to convert browsers to buyers.
– Suggest pairings: “Those crackers pair great with this chutney.”
– Collect emails or offer loyalty punch cards for repeat business.
– Encourage social proof: politely ask satisfied customers to tag you on social media.
Payment systems and recordkeeping
– Mobile card readers (Square, Stripe, etc.) are fast and popular; ensure you know average processing fees and connect to your bank account.
– Keep a daily sales log: cash sales, card totals, tax collected, samples given (for inventory adjustments).
– Reconcile daily to monitor sell-through and avoid surprises.
Realistic downsides and when to pivot
Markets aren’t always the right channel forever. Consider these realities:
Weather and seasonality risk
– Outdoor markets cancel or attract fewer customers in poor weather.
– Off-season sales may require indoor markets or different product SKUs.
Inventory and spoilage
– Perishable items can lead to waste. Start with conservative batches and adjust.
– If spoilage is high, consider freezing items or moving to more shelf-stable product lines.
Time and ROI
– Markets require early mornings, setup, and teardown. Consider the hourly value of running a stall versus other opportunities.
– If sales per market day don’t justify time and costs after a season of iterations, consider online sales, wholesale, or farmers’ market co-ops.
Scaling options
– Wholesale to local stores and cafes.
– Subscription boxes or CSA add-ons.
– Wholesale markets and events with broader reach.
– Partnerships with complementary vendors for combined promotions.
Final practical checklist to launch in one season
– Confirm product fit and do a small demand test.
– Identify 2–3 target markets and apply early with tailored materials.
– Register business and sales tax permit; determine cottage-food vs commercial kitchen needs.
– Secure required insurance and health permits.
– Build simple, compliant labels and packaging.
– Prepare a realistic budget and breakeven targets.
– Buy essential booth equipment and set up a reliable POS.
– Practice setup and a 15-minute customer pitch; run mock sales with friends.
– Start small, track daily results, and iterate price, placement, and product mix.
Markets are a learning laboratory: treat your first season as a test. Track what sells, listen to customers, and use the cashflow and feedback to improve production, packaging, and pricing. With the right compliance steps, a care for customer experience, and consistent presence, your stall can go from a weekend experiment to a dependable local business.